

Our Brew Guides
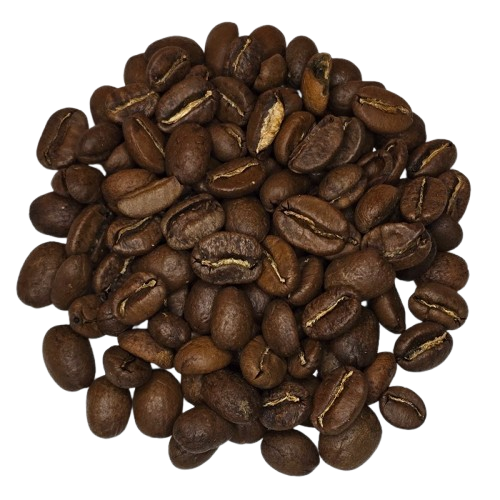
High up a mountain, a very long way from the UK is a small family farm. The owners are doing a fantastic job of growing and harvesting the berries that eventually make their way to the UK, and then to our specialist roasters. Those beans have now been hand roasted by our highly experienced roasters and now they have arrived on your doorstep. It’s a great start – you have some of the best coffee in the world in your hands.
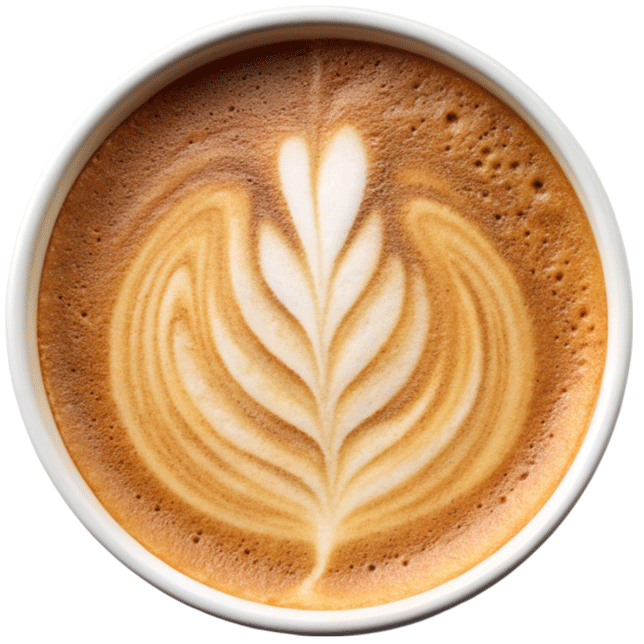
Grab a mug, and let’s make some great tasting speciality coffee.
Brewing Tips starting with whole beans:
- If you have whole beans, make your coffee soon after grinding – within 15 minutes is ideal. It’s best to grind only what you need right now.
- Match the coffee grind particle size to your brewing method – longer brewing times (for example for a French Press) use coarser grinds, while shorter brewing methods (espresso) use finer grinds.
- Try using 28g of coffee for 450g of water (a “1:16” ratio) as a starting point.
- Use filtered purified water (clean, free of chlorine, odour-free, etc.) between 91ºC to 96 ºC, i.e. just below boiling temperature.
- Keep your equipment clean and dry when not in use.
- Adjust to taste: Try first adjusting your grind size. Then try adjusting the amount of coffee you use.
Brewing Tips starting with ground coffee:
- Keep the bag of ground coffee closed as long as possible.
- Only open the ground coffee bag when you are ready to make coffee. Take out the right amount** and close the bag using the seal, squeezing out as much air as you can.
- Try using 28g of coffee for 450g of water (a “1:16” ratio) as a starting point.
- Use filtered purified water (clean, free of chlorine, odour-free, etc.) between 91ºC to 96 ºC, i.e. just below boiling temperature.
- Keep your equipment clean and dry when not in use.
- Adjust to taste: Try first adjusting your grind size. Then try adjusting the amount of coffee you use.
Adjusting Taste:
Try adjusting either the grind size or the amount of coffee you use. It’s important to only change one variable at a time; otherwise, you won’t know which change led to your desired taste profile.
Changing the size of the grind can significantly influence the taste of your coffee. If your coffee has a bitter taste, use a coarser grind; if the coffee tastes sour, use a finer grind.
Brewing Methods
When it comes to brewing that perfect cup of coffee, there are many options available. Which method you use is down to personal preference.
If you really want coffee that tastes like it was made in a coffee shop, get an espresso machine (we have lots of good options here).
Whether you prefer simple or fancy, here’s a guide covering the more popular brewing methods.
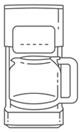


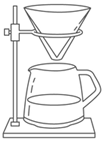
 Home Drip Brewer
To brew your coffee with a home brewer, make sure it’s clean with no old coffee residues. For every 450g of water, try 28g of “drip” ground coffee.
- Place a clean and dry filter into the brew basket.
- Add ground coffee to the filter and start the brewing cycle.
- Swirl the jug before you pour a cup.
- Do not allow the coffee to continue to cook on a heated plate.
 Cafetiere
To brew your coffee with a French Press/Cafetiere you will need 60 grams of coarsely ground coffee, to 1 litre of nearly-boiling water. It may help you to use a weighing scale (to measure out what you need), and a timer. The brewing process takes about 4 minutes.
Before you put ground coffee in your Cafetiere, pre-heat it by rinsing with hot water, and be sure to have you mug ready to transfer the coffee to as soon as it’s finished brewing.
- Add the ground coffee and start your timer – then add enough water (about one quarter of the total required) to wet all the ground coffee. Stir and then wait 30 seconds.
- Add the remaining water, stir with a spoon and then wait 3 minutes.
- At 3:30, slowly start to sink the plunger down your cup.
- At 4:00 minutes, pour the brewed coffee.
- Once the coffee has cooled, clean the flask, plunger and screen filter gently, but very well. Let air dry.
 Aeropress
To brew your coffee with an aeropress, you will need 15 grams of finely ground coffee, 250 grams of nearly-boiling water, a timer and a scale. The brewing process will take about 2:15, give or take 15 seconds. Prepare your aeropress by adding a filter and rinsing it with hot water to preheat.
- Place the Aeropress on top of a sturdy mug, then place everything on top of a scale.
- Tare the scale to zero and add the coffee grounds.
- Quickly add 60g of water and stir to saturate all the grounds. Start your timer and let the coffee “bloom” for 30 seconds.
- Add the remaining water, remove the mug and press it from the scale.
- At 1:45, slowly press down with medium pressure for 00:30 until you hear a light hissing sound. Remove the press, swirl your coffee and enjoy!
- Once finished, clean each part of the Aeropress well and let air dry.
 Kalita 185
To brew your coffee using a Kalita 185, you will need 27 grams of medium- or coarse-ground coffee, 400 grams of nearly-boiling water, a scale, and a timer. You will want to rinse the filter with hot water prior to brewing to preheat the equipment and tare the scale to 0g.
- Place the Kalita on the scale, add the ground coffee, and re-tare the scale to 0g.
- Start the timer and begin adding 50g of water over 0:30 seconds, saturating all of the grounds.
- Allow the coffee to bloom until 0:45 to 1:00 (or until the coffee has stopped bubbling).
- Starting in the center, pour in a clockwise spiral motion, working towards the outer edge of the filter.
- Add water until the level reaches 3/4th the height of the dripper; it should be around 220g by 1:15.
- Let it drain to 1/4 of the dripper level.
- Starting at the edge of the filter, pour in a clockwise spiral motion towards the center of the filter – Pour to 340g by 1:50.
- Let it drain to 1/4 of the dripper level.
- Starting in the center of the filter, pour in a clockwise spiral motion towards the edge of the filter – Pour to 400g by 2:05 to 2:10.
Finish @ 3:00 (+/- 0:30) Swirl and Serve
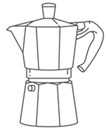
 Moka Pot
To brew your coffee in a Moka Pot, you will need 20 grams of finely ground coffee and 320 grams of boiling water. Start by pouring the boiling water into the bottom half of the pot, adding your coffee to the basket, giving it a shake to settle the grounds, and placing the basket on top of the bottom portion.
- Carefully screw on the Moka pot’s spouted top. *Use caution; the bottom chamber will be hot.
- Place the pot on a stove and apply medium heat with the top open.
- When the water in the bottom chamber approaches a boil, the pressure will push a stream of coffee slowly up through the upper chamber.
- *If it explodes upward, your water’s too hot; if it burbles slowly, turn up your flame.
- Your coffee is finished when you hear a bubbling or hissing sound; enjoy it within an hour of brewing!
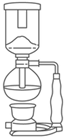
 Siphon
To brew your coffee with a siphon, you will need 35 grams of medium- or fine-ground coffee, 590 grams of nearly-boiling water, and a timer.
- Fill the bottom globe with already-heated water (to save time) and place it over a flame.
- Insert the hopper, filter and all into the bulb. Place the entire assembly above your heat source. Let top globe rest on the bottom globe, but do not fit them together too tightly.
- When water in bottom globe begins to boil, tightly fit top globe onto the bottom globe
- As water transfers to the top globe, stir to cool the water. Turn down the burner as well. Aim for 195°–200°F (94°C) without letting water transfer back to the bottom of the globe. A bit of water will remain at the bottom—this is fine.
- Pour the freshly ground coffee into the top globe and stir gently to saturate all the grounds. Avoid a metal stirrer—use bamboo or plastic. Let steep for 1-2 minutes.
- After steeping time has passed, stir the grounds again and remove the flame to start vacuum filtering.
- Filtering is complete when coffee in the bottom globe bubbles (about 1 minute).
- Pour into a pre-heated ceramic cup and serve immediately.
Tips for Storing Coffee
Imagine that roasted coffee beans are like small, hard sponges that absorb moisture and odours into their little cells, where the aromatic oils are. Leave your beans in an open packet anywhere and the beans will start to take in aromas and moisture. The basic principles of keeping roasted coffee fresh are to keep your coffee away from:
- Moisture
- Heat
- Sunlight
- Oxygen
- Odours
A well-sealed dark container of coffee in a cool cupboard or room (often a utility room if you have one where there is no central heating) is the best way to store your coffee once the packet has been opened.
We don’t recommend storing coffee in the fridge. This exposes the coffee beans to moisture/ condensation, which is then sealed into the bag and can make your brew taste like cardboard pretty quickly. Odours also abound in fridges.
You can store coffee in the freezer in well-protected, unopened packs of whole beans for up to a month. When you remove the frozen beans, let them warm to room temperature in your pantry first, then grind and brew within two weeks, as you do with fresh coffee. However, there is little need to freeze as roasted coffee stores well in sealed packets.
For additional information about how long roasted coffee stays fresh see our blog Fresh Coffee – what is fresh? which gives some great info including a date chart.